Skip to content
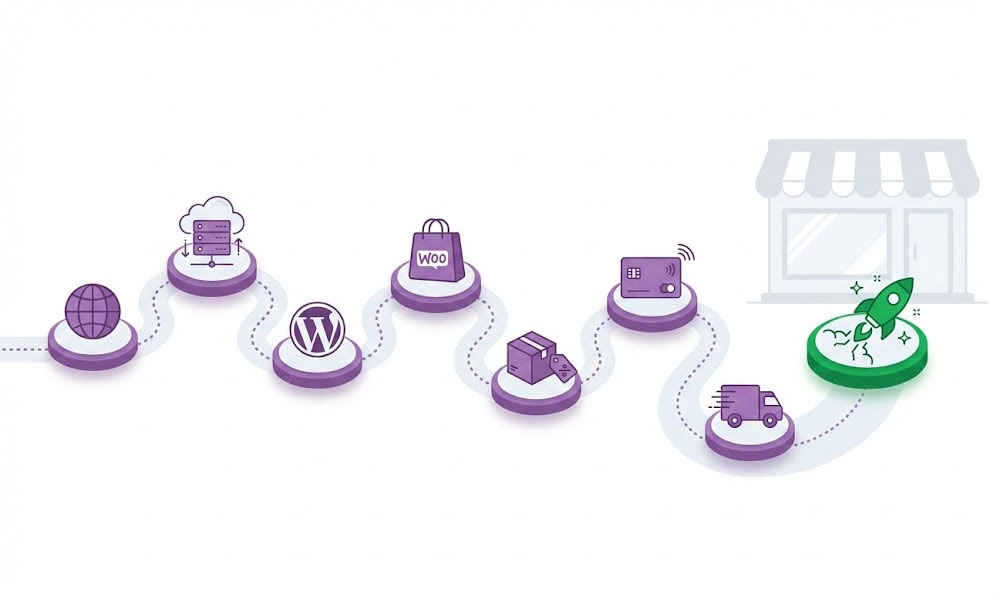
A candle maker in Virginia messaged me on Upwork last year saying she’d been selling through Etsy for three years and paying 15% in combined fees on every sale. She was doing $4,200/month in revenue and handing Etsy roughly $630/month. That’s $7,560/year in platform fees alone. She wanted her own store where she controlled the customer experience, kept her margins, and built an email list she actually owned. I built her a WooCommerce store in two weeks. Her total ongoing cost: about $35/month for hosting and a couple of paid plugins. She went from paying $630/month in Etsy fees to $35/month in operating costs while keeping the same traffic through Google organic and Instagram.
WooCommerce powers over 36% of all online stores globally. It’s free, open-source, and runs on WordPress, which means you get the full flexibility of the world’s most popular content management system behind your store. This guide walks through every step from zero to a live, accepting-payments online store. Every step includes the specific tools and settings I use on client stores across 400+ Upwork projects.
Before You Start: What You’ll Need
Budget. A functional WooCommerce store can launch for $200-$500 upfront plus $20-$50/month in ongoing costs. That covers hosting, domain, a quality theme, SSL certificate (usually free with hosting), and 2-3 essential paid plugins. Compare that to Shopify at $39-$399/month plus transaction fees, or the marketplace fees that eat 10-15% of every sale on Etsy and Amazon.
Products. Physical products, digital downloads, services, subscriptions, memberships, or any combination. WooCommerce handles all of these natively or through extensions. Have at least 5-10 products ready with: product name, description (100+ words each), 3-5 product photos per item (white background recommended for primary images), prices, weights and dimensions (for shipping calculations), and SKUs if you use them.
Content. Beyond products, you’ll need: an About page telling your brand story, a shipping policy, a return/refund policy, a privacy policy (required by law if you collect customer data), and contact information. Write these before starting the build. Waiting on content is the number one reason store launches get delayed.
Timeline. A simple WooCommerce store with 10-50 products takes 1-2 weeks to build yourself following this guide, or 3-5 business days if you hire a developer to handle it.
Step 1: Domain and Hosting
Your domain is your store’s address. Your hosting is the server that runs it. Getting both right from the start prevents expensive migrations later.
Domain registration. Register your domain through Namecheap ($10-$15/year) or Cloudflare Registrar (at-cost pricing, often $8-$10/year). Keep domain registration separate from hosting. If you ever need to switch hosting providers, your domain stays with you without complications. Choose a .com if available. Keep it short, memorable, and easy to spell. Avoid hyphens, numbers, and creative misspellings that customers will mistype.
Hosting for WooCommerce. WooCommerce stores need more server resources than standard WordPress sites because every product page, cart interaction, and checkout process runs dynamic database queries. The hosting tier that’s fine for a blog will buckle under a WooCommerce store with 50+ products and real traffic.
My hosting recommendations by store size:
Starter stores (under 100 products, under 10,000 monthly visitors). Cloudways Vultr High Frequency ($14/month) or SiteGround GrowBig ($15/month). Both offer PHP 8.2+, SSD storage, free SSL, staging environments, and server-level caching. Either handles a typical small WooCommerce store comfortably.
Growing stores (100-1,000 products, 10,000-50,000 monthly visitors). Cloudways Vultr High Frequency 2GB ($28/month) or Kinsta Starter ($35/month). More RAM, more PHP workers, better database performance. Object caching (Redis) available for reducing database load on product pages.
High-traffic stores (1,000+ products, 50,000+ monthly visitors). Cloudways with Vultr High Frequency 4GB+ ($54+/month) or Kinsta Business ($115/month). Dedicated resources, Redis object caching, CDN integration, and auto-scaling for traffic spikes during sales events.
What to avoid. Shared hosting under $10/month from EIG brands (Bluehost, HostGator). You’re sharing server resources with hundreds of other sites. When one site on the server gets traffic, your store slows down. WooCommerce checkout pages on shared hosting regularly hit 3-5 second load times, and every additional second of checkout load time increases cart abandonment by 7-10%. This directly ties to speed optimization principles.
Step 2: Install WordPress and WooCommerce
WordPress installation. Most quality hosting providers offer one-click WordPress installation. On Cloudways: click “Add Application,” select WordPress, choose your server, done. WordPress is installed in under 3 minutes. On SiteGround: Site Tools > WordPress > Install & Manage > select domain. On Kinsta: Sites > Add Site > Install WordPress.
Initial WordPress settings. Before installing WooCommerce, configure these WordPress basics:
Settings > General: Set site title (your store name) and tagline (your value proposition). Set timezone to your business location.
Settings > Permalinks: Select “Post name” (/%postname%/). This creates clean URLs like yourstore.com/blue-cotton-t-shirt/ instead of yourstore.com/?p=47. This setting directly impacts SEO and should never be changed after products are live.
Settings > Discussion: Uncheck both “Allow people to submit comments on new posts” options unless you specifically want product reviews through WordPress comments (WooCommerce has its own review system). Disabling comments prevents spam and reduces unnecessary database queries.
WooCommerce installation. Navigate to Plugins > Add New > search “WooCommerce” > Install Now > Activate. WooCommerce’s setup wizard walks through initial configuration: store location (determines default tax rates and currency), industry type, product types you’ll sell, and business details. Complete the wizard. It creates essential pages automatically: Shop, Cart, Checkout, and My Account.
WooCommerce settings to configure immediately.
WooCommerce > Settings > General: Store address (used for tax calculations and shipping origin), currency, and selling locations (sell to all countries, or specific countries only).
WooCommerce > Settings > Products > General: Weight unit (kg or lbs), dimension unit, enable reviews if you want product ratings.
WooCommerce > Settings > Accounts & Privacy: Enable guest checkout (critical for conversions, many first-time buyers abandon carts when forced to create an account), enable account creation during checkout (optional, not forced).
Step 3: Choose and Configure Your Theme
Your theme controls how your store looks. The wrong theme creates speed problems, SEO issues, and design limitations that plague your store for years.
My recommendation: Astra + Elementor Pro. On every WooCommerce project I build, I use the Astra theme (free or Pro) with Elementor Pro as the page builder. Astra is lightweight (under 50KB), WooCommerce-optimized, and provides full design control without bloat. Elementor Pro adds the WooCommerce Builder that lets you custom-design product pages, shop archives, cart, checkout, and My Account pages with drag-and-drop editing.
Why not a “WooCommerce theme” from ThemeForest? Most ThemeForest WooCommerce themes ship with 30-50 bundled plugins (sliders, mega menus, portfolio managers, visual composers) that load on every page whether you use them or not. A typical ThemeForest WooCommerce theme adds 1-3 seconds to page load time before you’ve added a single product. The speed impact directly hurts conversions and search rankings.
Astra + WooCommerce configuration. After installing Astra: Appearance > Astra Options > enable WooCommerce module. Configure: product catalog layout (grid with 3-4 columns), single product layout, cart and checkout style, and quantity buttons. Astra’s WooCommerce settings are more granular than most themes and integrate cleanly with Elementor’s WooCommerce widgets.
Alternative themes. If not using Astra: Kadence (similar lightweight approach, free version works for basic stores), GeneratePress (minimalist, fast, requires more CSS customization), or flavor themes designed for specific niches. All three are Elementor-compatible and WooCommerce-optimized. Avoid themes that require their own proprietary page builder because you’re locked into that builder forever. Theme customization is part of my standard build process.
Step 4: Add Your Products
This is where your store starts becoming real. Product data quality directly determines your search visibility, conversion rate, and customer satisfaction.
Simple products. One product, one price, no variations. Example: a scented candle for $24.99. Navigate to Products > Add New. Enter: product title (include the primary keyword naturally), long description (100-300 words including materials, dimensions, use cases, and care instructions), short description (25-50 words shown on the shop page), regular price, sale price (if applicable), and SKU.
Variable products. One product with multiple options. Example: a t-shirt available in S/M/L/XL and 4 colors. Create the product as “Variable product” type. Set up Attributes (Size: S, M, L, XL and Color: Black, White, Navy, Red). Generate variations from attributes. Set individual prices, stock quantities, and images per variation if they differ.
Digital products. Downloadable files: ebooks, templates, music, software. Check “Virtual” and “Downloadable” boxes. Upload the file. Set download limit (number of times the customer can download) and download expiry (days after purchase).
Product images. Primary image: clean, well-lit, white or neutral background, minimum 800×800 pixels, WebP format for speed. Gallery images: 3-5 additional angles, lifestyle shots (product in use), detail close-ups, and size reference images. Every image needs descriptive alt text for SEO and accessibility. Example: “handmade soy candle lavender scent 8oz glass jar” not “IMG_4782.”
Product categories and tags. Categories are hierarchical (Clothing > T-Shirts > Graphic Tees). Create a logical category structure before adding products. Tags are flat and supplementary (cotton, summer, casual). Don’t create tags with only 1-2 products; they become thin pages that hurt SEO. RankMath can noindex tag archives to prevent this issue.
Product SEO with RankMath. Every product page should have: a unique SEO title including the product name and a relevant modifier, a unique meta description (150-160 characters describing the product with a purchase incentive), and a clean URL slug matching the product name. RankMath handles Product schema markup automatically, enabling price, availability, and rating rich snippets in Google.
Step 5: Configure Payment Gateways
Customers need to be able to pay you. The payment gateway you choose affects your conversion rate, transaction fees, and the countries you can sell to.
Stripe (recommended primary gateway). Supports credit/debit cards, Apple Pay, Google Pay, and 135+ currencies. Transaction fee: 2.9% + $0.30 per transaction (US). Setup: install “WooCommerce Stripe Payment Gateway” plugin (free, by WooCommerce), connect your Stripe account, enable test mode, process a test transaction, switch to live mode. Stripe handles PCI compliance for you, meaning you don’t need to deal with credit card security certification yourself.
PayPal (recommended secondary gateway). Many customers prefer PayPal, especially for first purchases from unfamiliar stores. WooCommerce ships with PayPal integration built in. Transaction fee: 2.99% + $0.49 (US). Enable PayPal alongside Stripe so customers choose their preferred method at checkout. More payment options at checkout directly reduces cart abandonment.
Square. Best for businesses that also sell in physical locations and want unified online/offline inventory. Transaction fee: 2.9% + $0.30 online. WooCommerce Square plugin syncs inventory between your physical POS system and online store in real time.
Payment gateway tips for conversions. Enable at least 2 payment methods (Stripe + PayPal minimum). Display accepted payment icons in the footer (Visa, Mastercard, AMEX, PayPal, Apple Pay). Enable express checkout buttons (Apple Pay, Google Pay through Stripe) that skip the entire checkout form. Test the complete purchase flow yourself before launching, on both desktop and mobile.
Step 6: Set Up Shipping
Shipping configuration determines whether customers complete their purchase or abandon their cart at the last step. Unexpected shipping costs at checkout are the number one cause of cart abandonment in e-commerce.
Flat rate shipping. Simplest option. Set a fixed shipping cost per order or per item. Works well for stores where products are similar sizes and weights. Example: $5.95 flat rate for all domestic orders, $15.95 for international. Configure in WooCommerce > Settings > Shipping > Add Shipping Zone.
Free shipping threshold. “Free shipping on orders over $50” is one of the most effective conversion tactics in e-commerce. Create a shipping method with a minimum order amount condition. Customers who are close to the threshold add more items to qualify, increasing average order value. Display the free shipping threshold prominently on the shop page, in the cart, and in the site header.
Real-time carrier rates. For stores with products of varying sizes and weights, real-time calculations from USPS, UPS, FedEx, or DHL give accurate shipping costs at checkout. Requires a shipping plugin (WooCommerce Shipping for USPS/DHL is free, Table Rate Shipping for complex rules is $99/year). Enter accurate product weights and dimensions for every product.
Shipping zones. Create zones based on where you ship: Domestic (your country), North America, Europe, Asia-Pacific, Rest of World. Each zone can have different shipping methods and rates. Exclude countries you don’t ship to. Common setup: free shipping domestic over $50, flat rate $5.95 domestic under $50, flat rate $15.95 international.
Local pickup. If you have a physical location, enable local pickup as a free shipping option. Customers who live nearby save on shipping and you save on packaging and carrier costs. WooCommerce supports this natively.
Step 7: Essential Plugins for Your WooCommerce Store
WooCommerce core handles products, cart, checkout, and orders. These additional plugins round out a professional store. Keep total plugin count under 15 to maintain speed.
SEO: RankMath (free). Handles Product schema (price, availability, ratings in Google), XML sitemaps including product sitemaps, meta titles and descriptions per product, breadcrumbs, and 404 monitoring. Far superior to Yoast for WooCommerce, as detailed in my RankMath vs Yoast comparison. Configure Product as the default schema type for the Products post type.
Security: Wordfence (free). Firewall, malware scanning, login protection, and brute force attack prevention. Essential for any site handling customer payment data. Even though Stripe handles PCI compliance for credit card processing, your WordPress site still stores customer names, emails, addresses, and order history. A security breach on a store is significantly more damaging than on a blog.
Backups: UpdraftPlus (free) or BlogVault ($89/year). Automated daily backups stored off-site (Google Drive, Dropbox, Amazon S3). A store with active orders needs daily backups minimum. Losing a week of orders due to a server failure or hack is a business emergency. BlogVault includes real-time backups that capture every order as it happens.
Caching: WP Rocket ($59/year). Page caching, browser caching, database optimization, lazy loading, CSS/JS minification, and CDN integration in one plugin. WP Rocket has specific WooCommerce compatibility: automatically excludes cart, checkout, and My Account pages from caching (these pages must be dynamic, never cached, because they display unique user-specific content). This is the same caching solution I recommend in the speed optimization guide.
SMTP email: WP Mail SMTP (free) or FluentSMTP (free). WordPress default email delivery is unreliable. Order confirmations, shipping notifications, and password resets fail silently with default PHP mail. Connect to a proper SMTP service (Brevo free tier sends 300 emails/day, or Amazon SES at $0.10 per 1,000 emails for higher volume) to ensure every customer email actually arrives.
Optional but recommended. CartFlows (sales funnels, upsells, order bumps), WooCommerce Subscriptions (recurring billing), WooCommerce Memberships (gated content), Custom Order Status Manager (custom fulfillment workflows), and MonsterInsights or Google Site Kit (Google Analytics integration with e-commerce tracking).
Step 8: Pre-Launch Checklist
Before announcing your store to the world, verify everything works. A broken checkout on launch day loses customers who won’t come back.
Functional testing. Add a product to cart. Complete the entire checkout flow using Stripe test mode. Verify: order confirmation email arrives, order appears in WooCommerce > Orders, payment shows in Stripe dashboard, inventory decreases by the purchased quantity. Repeat for PayPal if enabled. Test on desktop AND mobile (50%+ of e-commerce traffic is mobile).
Page speed testing. Run pagespeed.web.dev on your homepage, shop page, a product page, and the checkout page. Target: under 3 seconds load time on mobile for all four. Product pages with image galleries and checkout pages with payment form JavaScript are typically the slowest. Address any issues before launching. Speed optimization directly impacts conversion rates: every 1-second improvement in load time increases conversions by 7-10%.
SEO verification. Verify RankMath Product schema at search.google.com/test/rich-results for 2-3 product pages. Confirm sitemap includes all products at /sitemap_index.xml. Submit sitemap to Google Search Console. Verify all product pages have unique titles, descriptions, and alt text on images. Check that cart, checkout, and My Account pages are noindexed (they contain no unique content valuable for search and create duplicate content issues). My technical SEO checklist covers the complete verification process.
Legal pages. Privacy Policy (required if you collect any customer data, which you do): explain what data you collect, how you use it, who you share it with (payment processors, shipping carriers), and how customers can request data deletion. Terms and Conditions: cover order acceptance, payment terms, shipping timeframes, and dispute resolution. Refund/Return Policy: clearly state your return window, condition requirements, refund method, and who pays return shipping. Link all three from the checkout page footer and the site footer.
SSL verification. Every page must load over HTTPS with no mixed content warnings. Check the checkout page specifically because payment form JavaScript from Stripe/PayPal loads from external domains and any mixed content warning will prevent payments from processing and display “Not Secure” in the browser address bar. Force HTTPS redirect server-side.
Mobile checkout testing. 65-70% of e-commerce browsing happens on mobile. Test the complete purchase flow on an actual phone (not just browser resize): product browsing, add to cart, cart review, checkout form entry, payment, and order confirmation. Verify: form fields are large enough to tap accurately, the keyboard type matches the input (numeric keyboard for phone numbers, email keyboard for email fields), and express checkout buttons (Apple Pay, Google Pay) appear and function on mobile.
After Launch: First 30 Days
Your store is live. Now the real work begins: driving traffic, optimizing conversions, and building the foundation for sustainable growth.
Week 1: Monitor everything. Check WooCommerce > Analytics daily for order volume, revenue, and conversion rate. Watch Google Search Console for indexing (are your product pages being discovered?). Monitor server performance (is hosting handling the load?). Fix any checkout issues immediately because every broken checkout costs you real revenue.
Week 2: SEO foundation. Submit your site to Google Search Console and Bing Webmaster Tools. Verify all product pages are indexed. Write unique category descriptions (these are often neglected but they’re the content Google uses to understand and rank your product category pages). Start building internal links between related products. An SEO audit at this stage catches issues before they compound.
Week 3: Content marketing. Start a blog section with content targeting informational keywords related to your products. A candle store blogs about “best candles for relaxation,” “soy vs paraffin candles,” and “how to make your candles last longer.” Each post links to relevant products. This is the content marketing engine that drives organic traffic without ongoing ad spend.
Week 4: Optimization. Review Google Analytics e-commerce reports: which products are viewed most, which have the highest add-to-cart rate, which have the highest abandonment. Identify where customers drop off and fix those points. Common fixes: adding more product photos, improving product descriptions, simplifying the checkout form, or adjusting shipping costs.
Ongoing maintenance. Weekly: process orders, respond to customer inquiries, monitor security scans. Monthly: update WordPress, WooCommerce, and all plugins (on staging first, then live after testing). Quarterly: review product performance, archive underperforming products, optimize top performers.
WooCommerce vs Shopify: Quick Comparison
People starting their first online store often choose between WooCommerce and Shopify. Here’s the honest comparison:
Choose WooCommerce when: you want full ownership and control, you’re already on WordPress, you need advanced customization (custom checkout flows, complex shipping rules, unique product types), you want to keep costs low long-term, or you need the SEO advantages of WordPress (WooCommerce inherits all of WordPress’s SEO flexibility, which Shopify cannot match).
Choose Shopify when: you want the simplest possible setup with minimal technical decisions, you don’t mind paying higher monthly fees for managed simplicity, or your product catalog is straightforward (simple products, standard checkout, basic shipping rules).
The SEO difference is significant. WordPress with WooCommerce gives you full control over URL structures, meta tags, schema markup, internal linking, page speed optimization, and content architecture. Shopify restricts URL structures (forced /collections/ and /products/ prefixes), limits metadata control, and constrains technical SEO options. For stores that plan to grow through organic search traffic rather than paid ads, WooCommerce’s SEO flexibility provides a measurable competitive advantage.
My detailed WordPress vs Shopify comparison covers pricing, features, and SEO differences comprehensively.
Common Mistakes to Avoid
Skipping staging. Never update WooCommerce, plugins, or themes directly on your live store. A plugin conflict during an update can break your checkout page, costing you every sale until it’s fixed. Always test updates on a staging environment first.
Installing 30+ plugins. Each plugin adds database queries, JavaScript files, and CSS stylesheets that load on every page. A WooCommerce store should run on 12-18 plugins maximum. Beyond that, you’re trading functionality for speed, and in e-commerce, speed is money. This is one of the 15 WordPress mistakes that costs the most in lost revenue.
Ignoring mobile checkout. If your checkout form is painful on mobile (tiny form fields, no autofill support, no express payment options), you’re losing 60-70% of potential mobile customers. Mobile checkout optimization alone can increase total store revenue by 15-25%.
No backup strategy. A WooCommerce store processes real money and real customer data. Daily automated off-site backups are the minimum. Test restoration quarterly. One hosting failure or hack without backups can destroy your business overnight.
Weak passwords and no 2FA. Your store admin account has access to customer names, email addresses, physical addresses, phone numbers, and order history. A compromised admin account is both a security breach and potentially a legal liability. 16+ character passwords with two-factor authentication on every admin account. Non-negotiable.
Frequently Asked Questions
How much does it cost to start a WooCommerce store?
$200-$500 upfront (hosting, domain, theme, essential plugins) plus $20-$50/month ongoing. A professional WooCommerce build on Upwork runs $1,000-$5,000 depending on complexity, number of products, and custom features needed. Full pricing breakdown on the cost page.
Can I migrate from Shopify or Etsy to WooCommerce?
Yes. WooCommerce importers handle product data, images, categories, and customer records from most platforms. Migration from Shopify is the most common request I handle. URL redirects from old Shopify URLs to new WooCommerce URLs are critical to preserve any existing Google rankings and backlinks.
Do I need coding skills to run a WooCommerce store?
No for basic stores. WooCommerce’s admin interface handles products, orders, shipping, and settings without code. Elementor handles design without code. Custom functionality (unique checkout flows, API integrations, complex shipping rules) requires PHP and developer expertise.
How do I handle taxes on WooCommerce?
WooCommerce includes basic tax configuration by location. For US stores selling across multiple states, use WooCommerce Tax (free, powered by Jetpack) or TaxJar ($19-$99/month) for automated real-time tax calculation. These services handle the complexity of varying state and local tax rates automatically.
Is WooCommerce secure for accepting payments?
Yes, when configured correctly. Stripe and PayPal handle PCI-compliant payment processing (credit card data never touches your server). Your responsibility is keeping WordPress, WooCommerce, and plugins updated, using strong passwords with 2FA, installing a security plugin, and maintaining proper file permissions. My security guide covers the complete checklist.
Ready to Launch Your Store?
Building a WooCommerce store yourself is absolutely possible following this guide. For store owners who want it done professionally, fast, and optimized from day one, I build WooCommerce stores as fixed-price projects on Upwork. Product setup, payment configuration, shipping rules, RankMath SEO, speed optimization, security hardening, and a training session so you can manage it independently.
Browse the portfolio, case studies, and reviews for verified results. Background on the about page. Platform comparisons: WordPress vs Shopify and WordPress vs Wix. Related: WordPress development, design, Elementor, theme customization, membership/LMS sites, advanced builds, maintenance, and migration. SEO: technical, on-page, audits, and link building. FAQ. Contact.